Requests come in two directions: ones sent to you, and ones you have sent. Here is how to handle each, and how to remove a friend later.
On the web
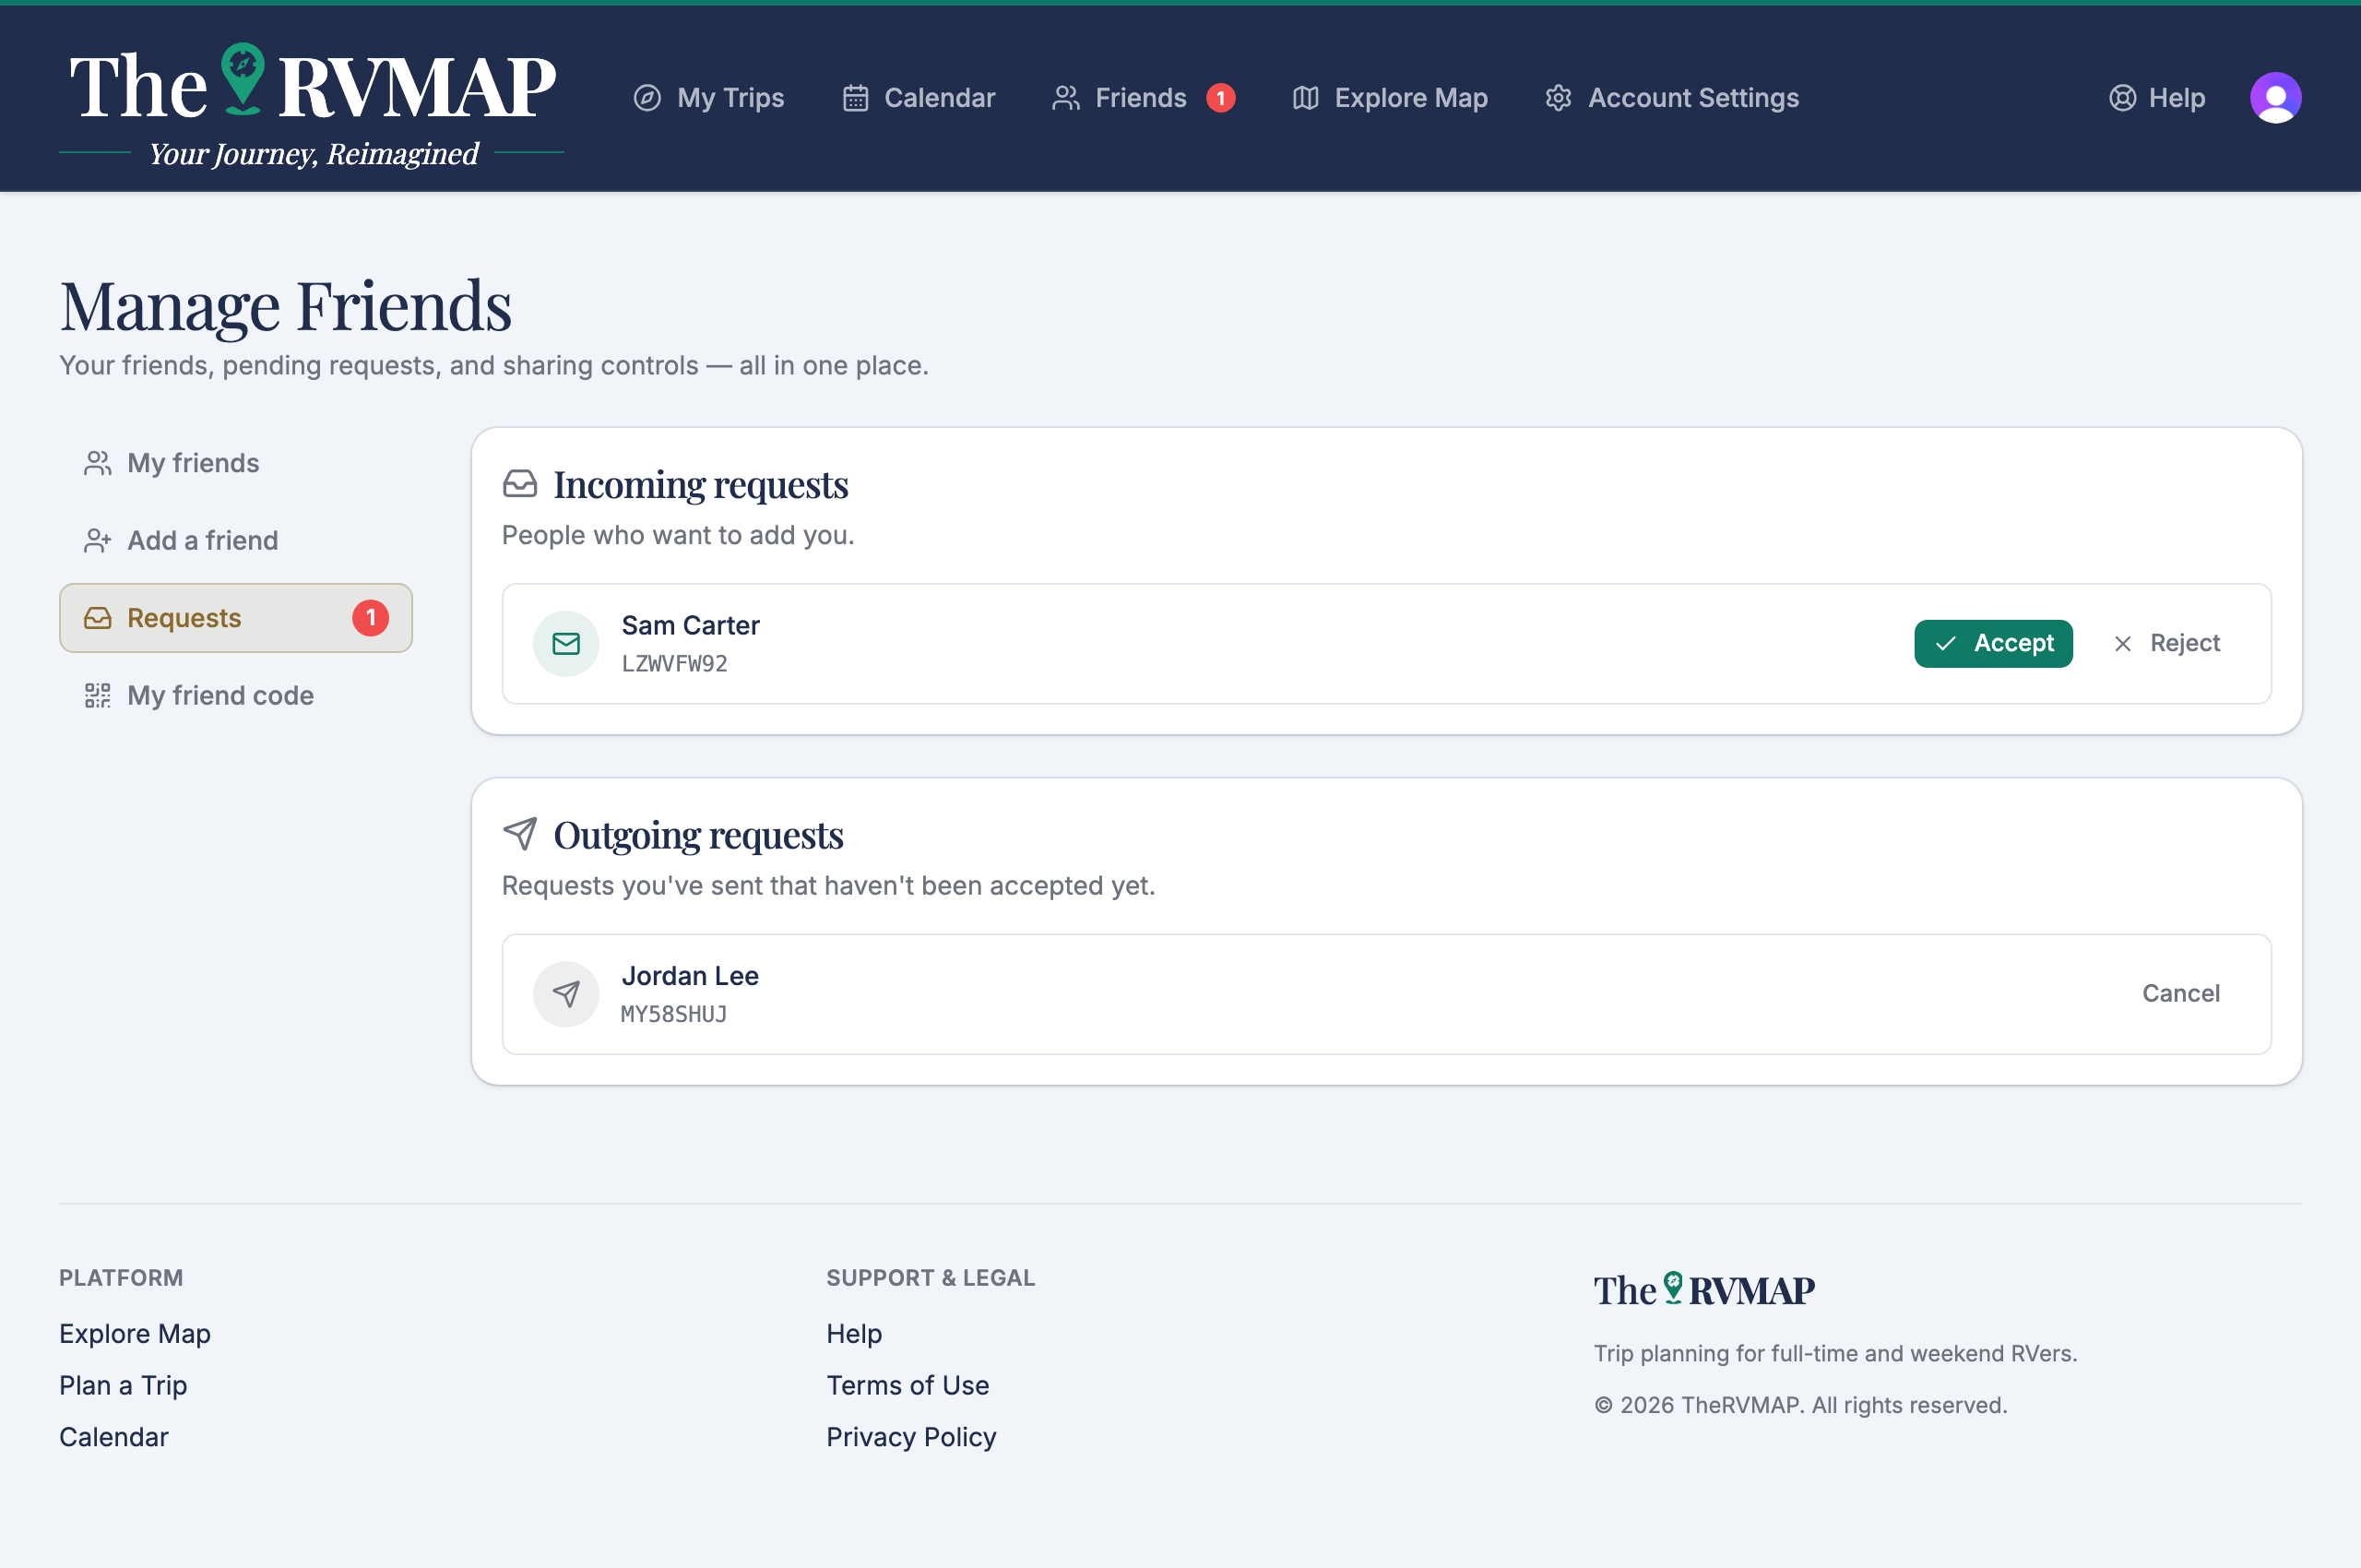
The web stacks Incoming requests and Outgoing requests on one page.
- Under Incoming requests, choose Accept or Reject.
- Under Outgoing requests, choose Cancel to take a request back.
A badge counts waiting requests on the Friends item in the navigation, on the Manage Friends button, and on the requests item. The count clears when you open the requests page.
In the app
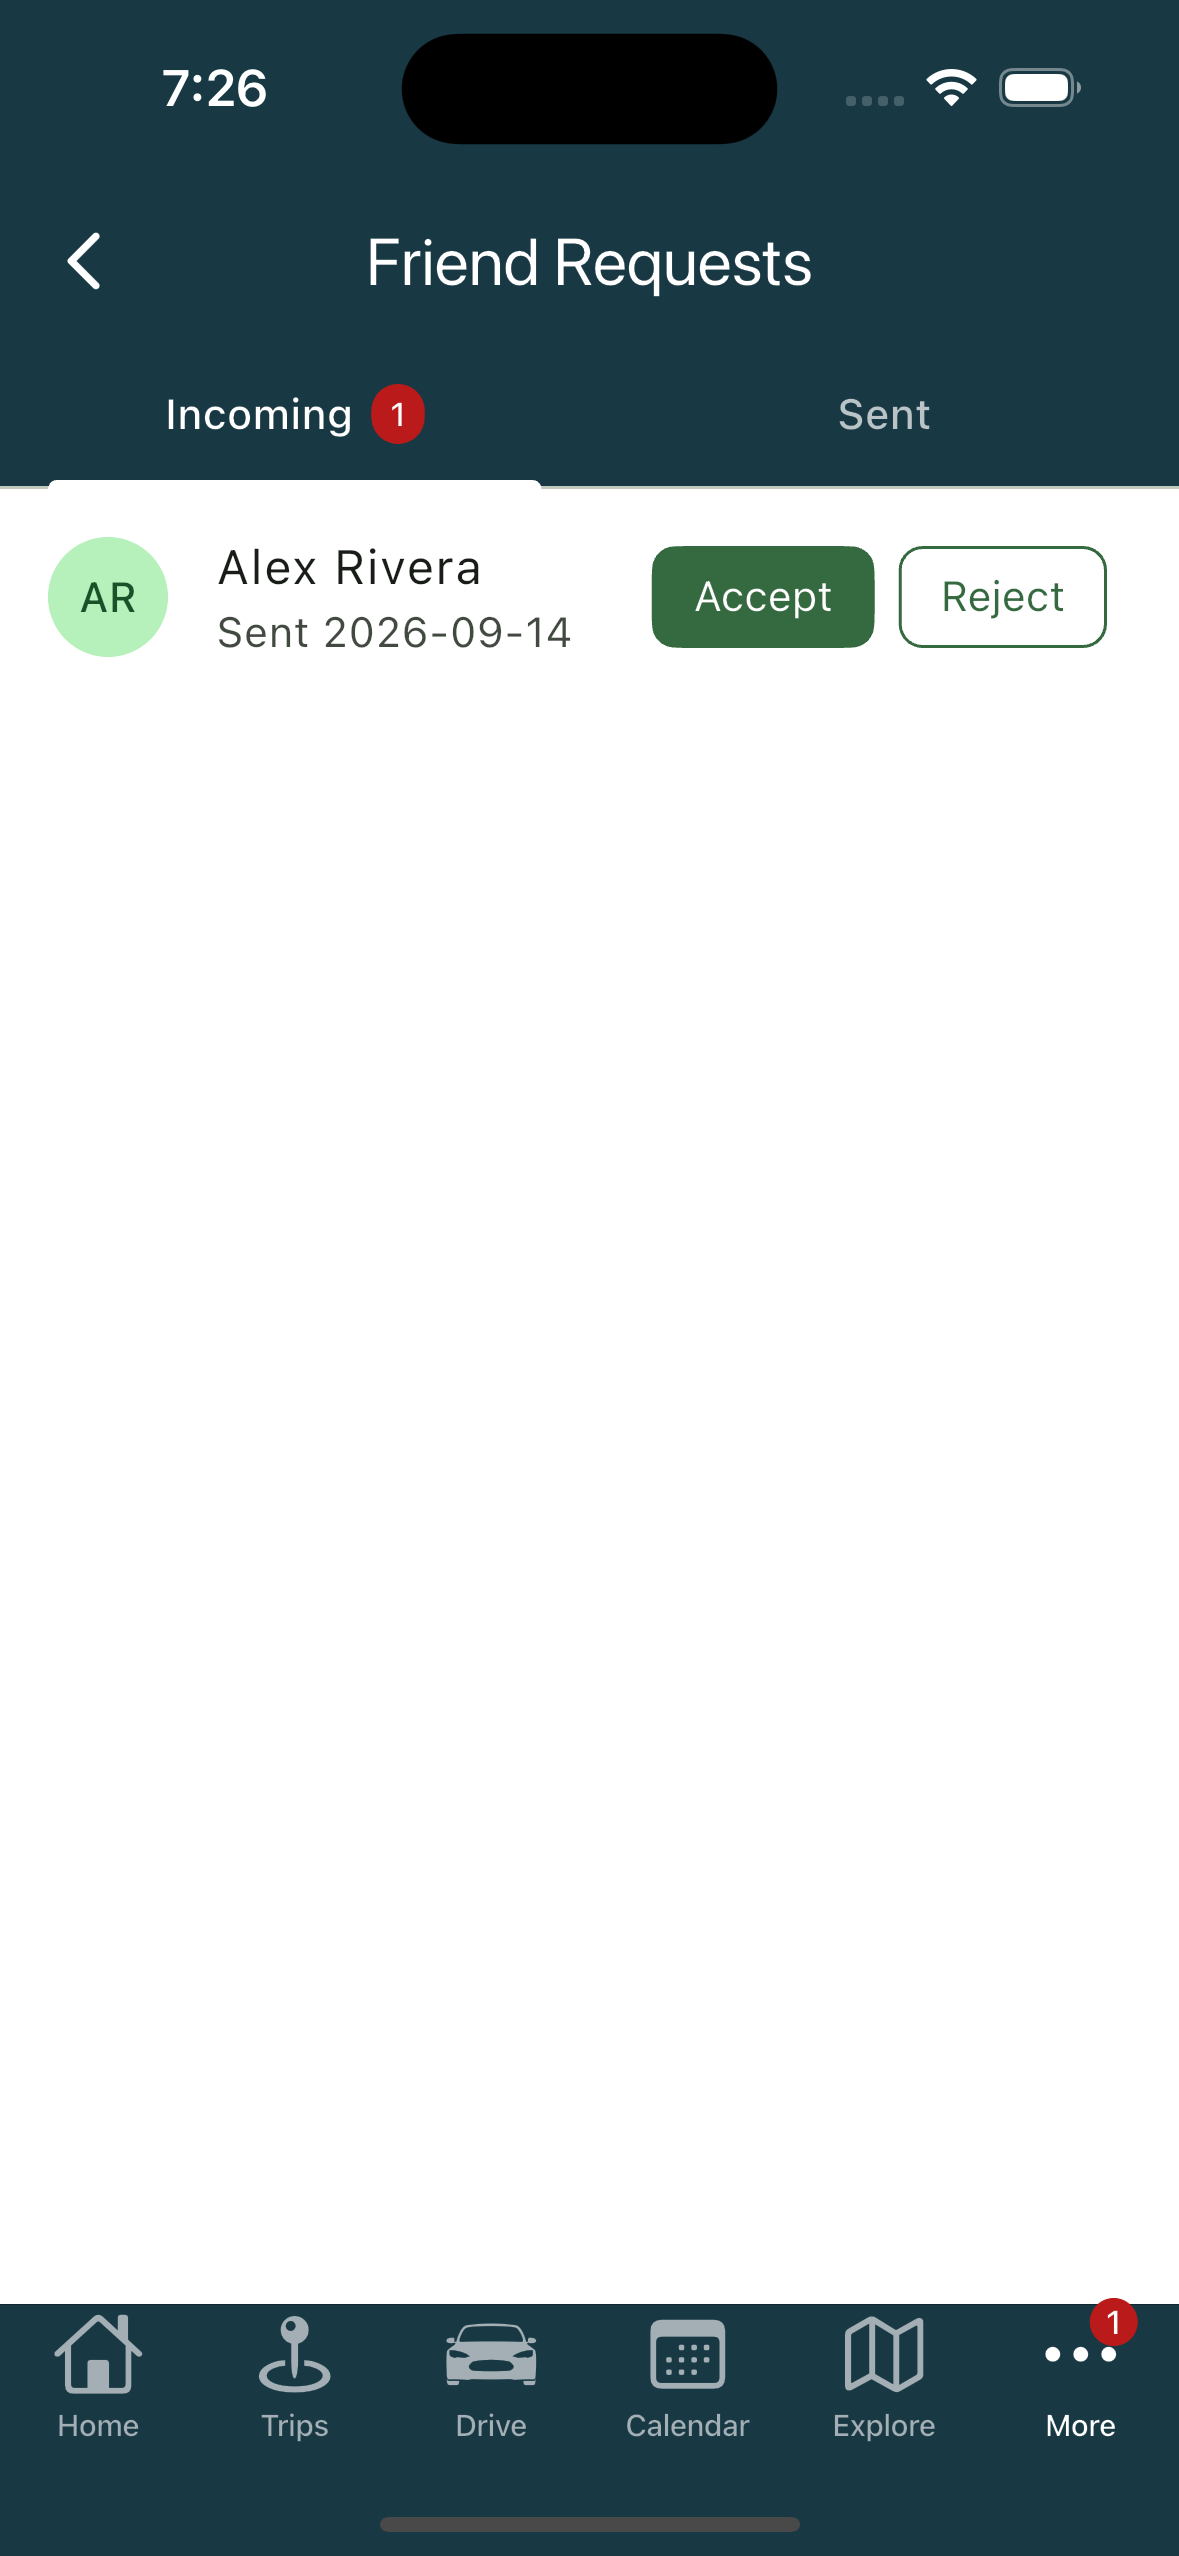
The app shows two tabs, Incoming and Sent.
- On Incoming, tap Accept or Reject.
- On Sent, tap Cancel request. The app asks you to confirm; the web does not.
On the phone the waiting count sits on the More tab and on the inbox icon on the Friends screen.
Removing a friend
On the web, open your friends list and choose Unfriend. A confirmation reminds you the person is not notified and can be invited again later.
On the phone there is no button: swipe the friend's row to remove them. You confirm, and you can send a new request later.
Related
- Adding friends
- Seeing where your friends are
- Sharing your location with friends
- What friends see while you drive
- Creating a trip
Was this article helpful?
That’s Great!
Thank you for your feedback
Sorry! We couldn't be helpful
Thank you for your feedback
Feedback sent
We appreciate your effort and will try to fix the article