A trip is the plan the rest of the planner hangs on. You give it a name, the rig you are taking, a departure date, and where you start and finish, and TheRVMAP builds the route from there.
First, an RV
You need an RV on your account before you can create a trip, because the route is built around your rig. On the web, with no RV added, you will see Add an RV and the create button stays disabled with the hint "Add an RV above to enable Create trip". The picker for choosing one reads Pick an RV. In the app, RV profile is marked as required. To add one, see "Adding your RV (and why the numbers matter)".
On the web
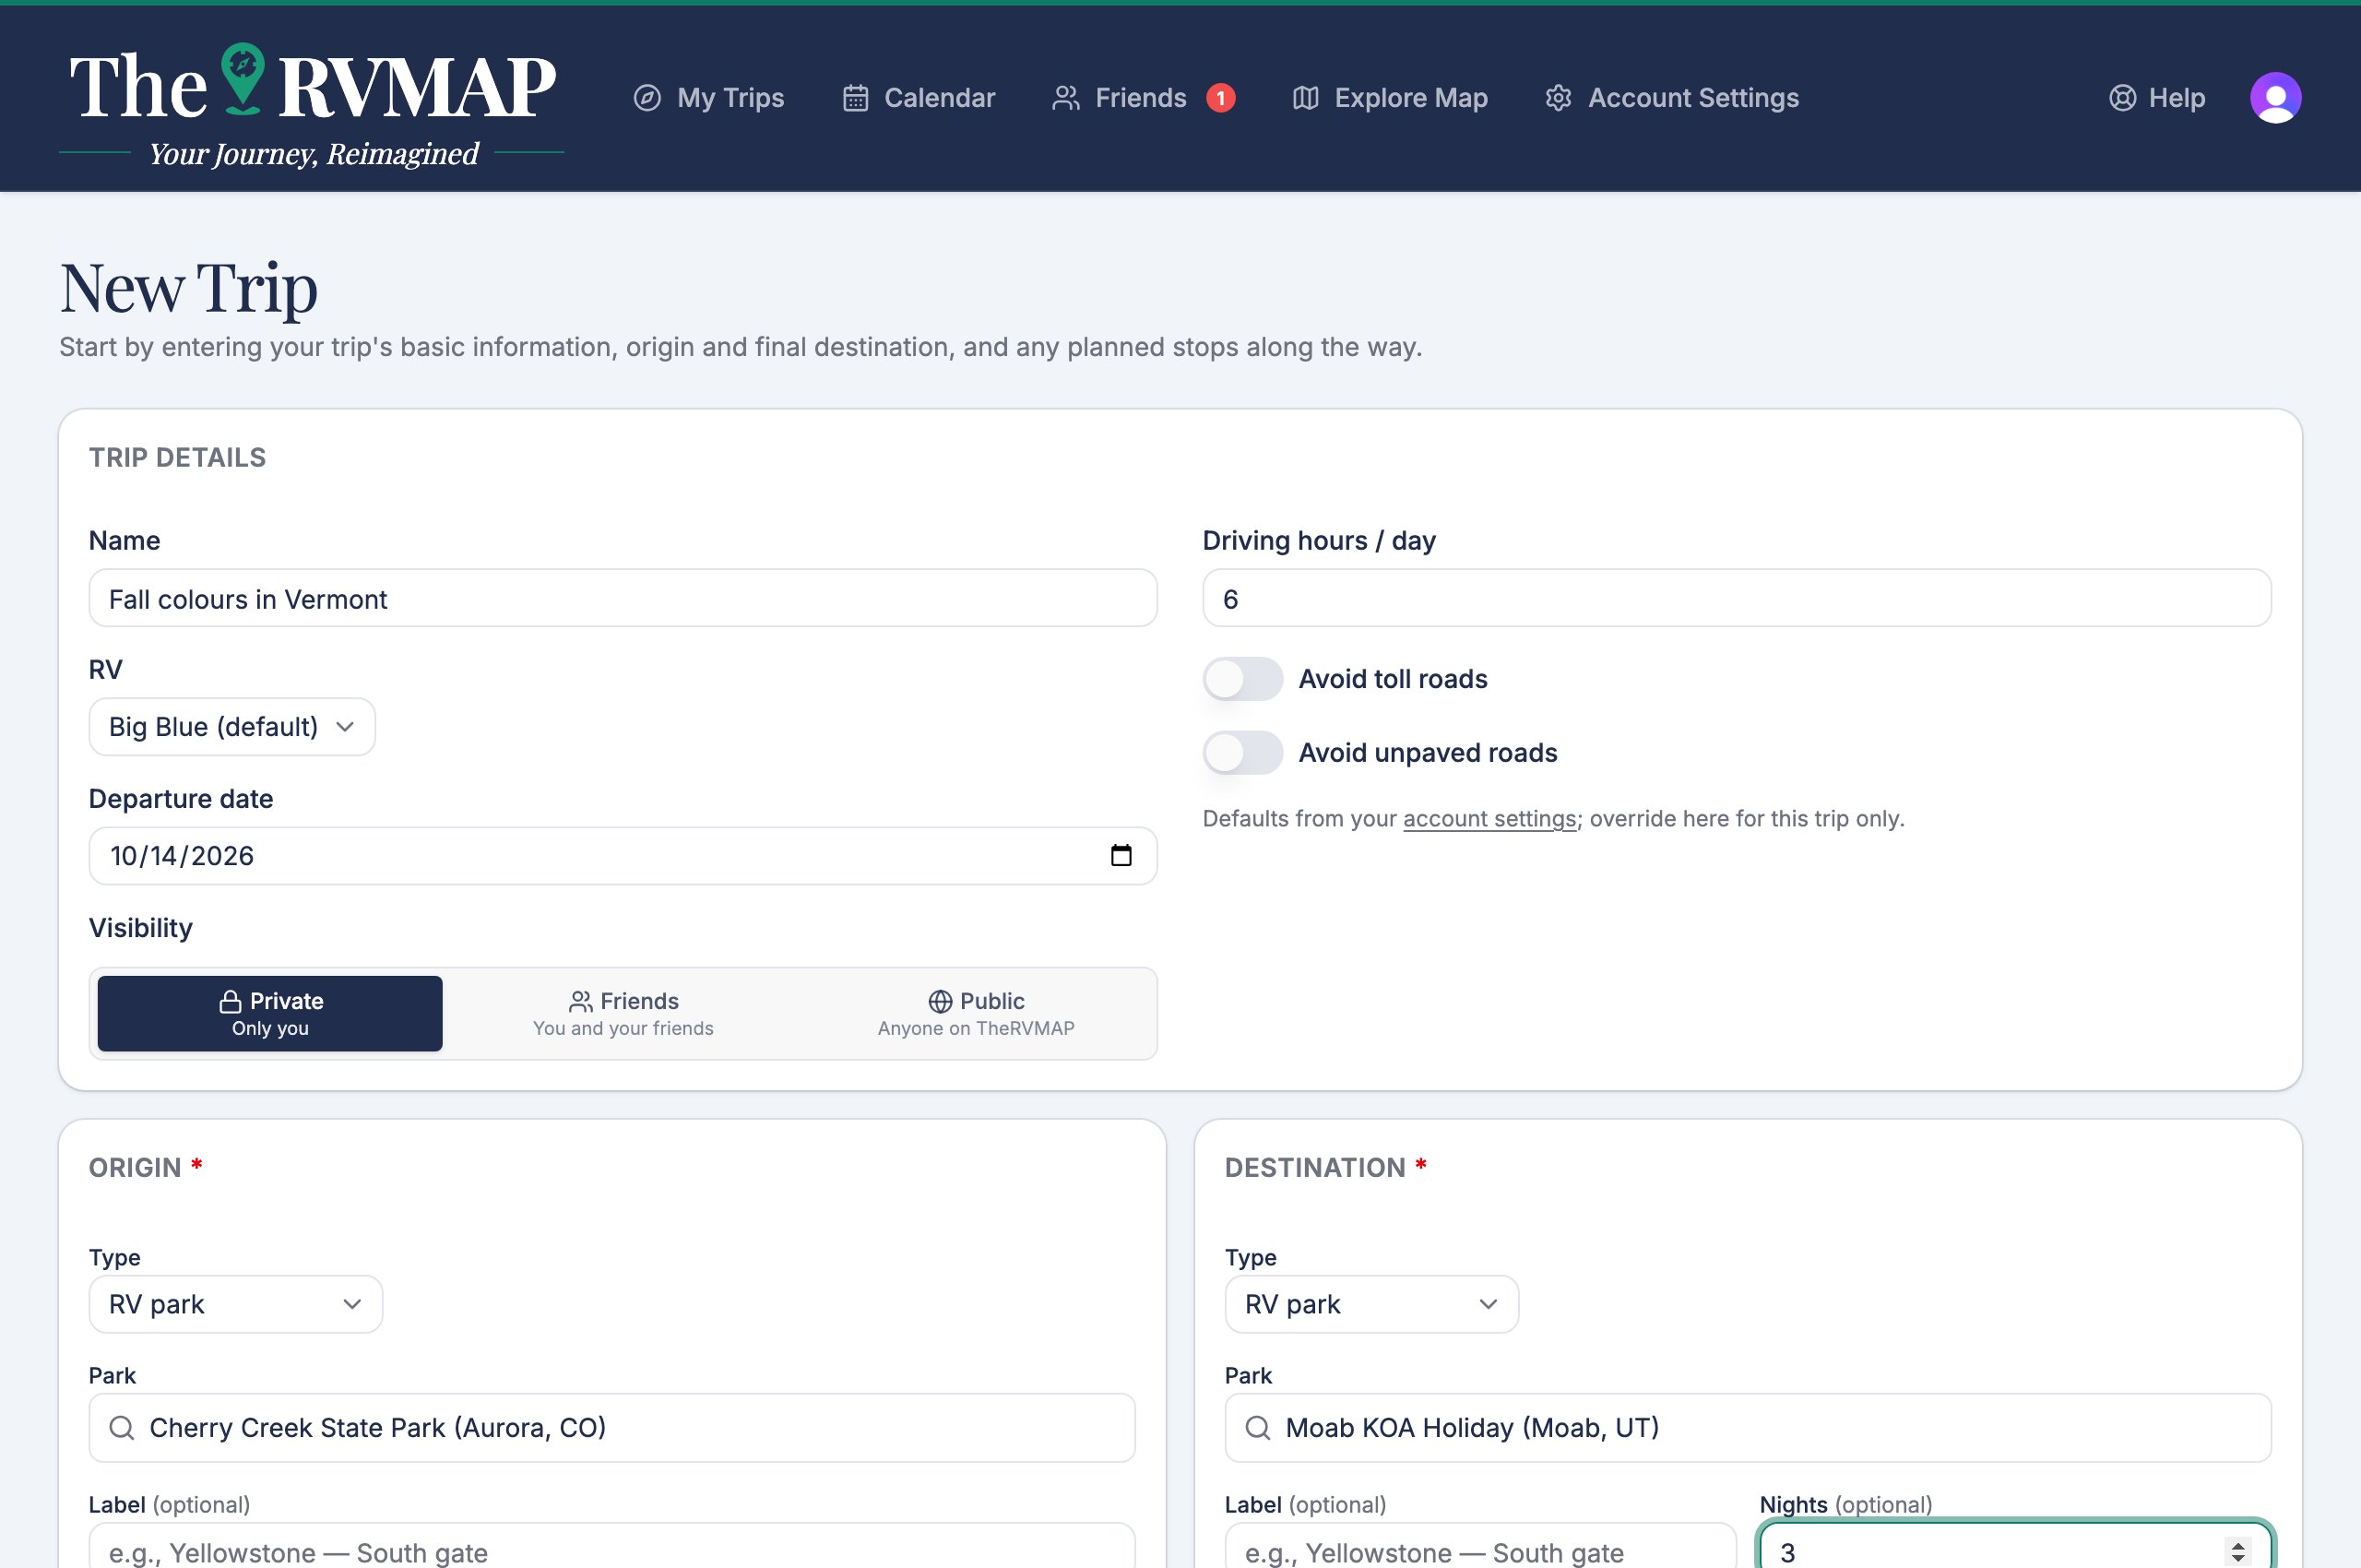
- Enter a trip name. The box suggests a format, like "e.g., Yellowstone loop".
- Choose your RV, a departure date, and a visibility.
- For your origin and destination, use the Type selector to pick Park or Location, then choose the place.
- Set Avoid toll roads and Avoid unpaved roads if you want them.
- Choose Create trip.
In the app
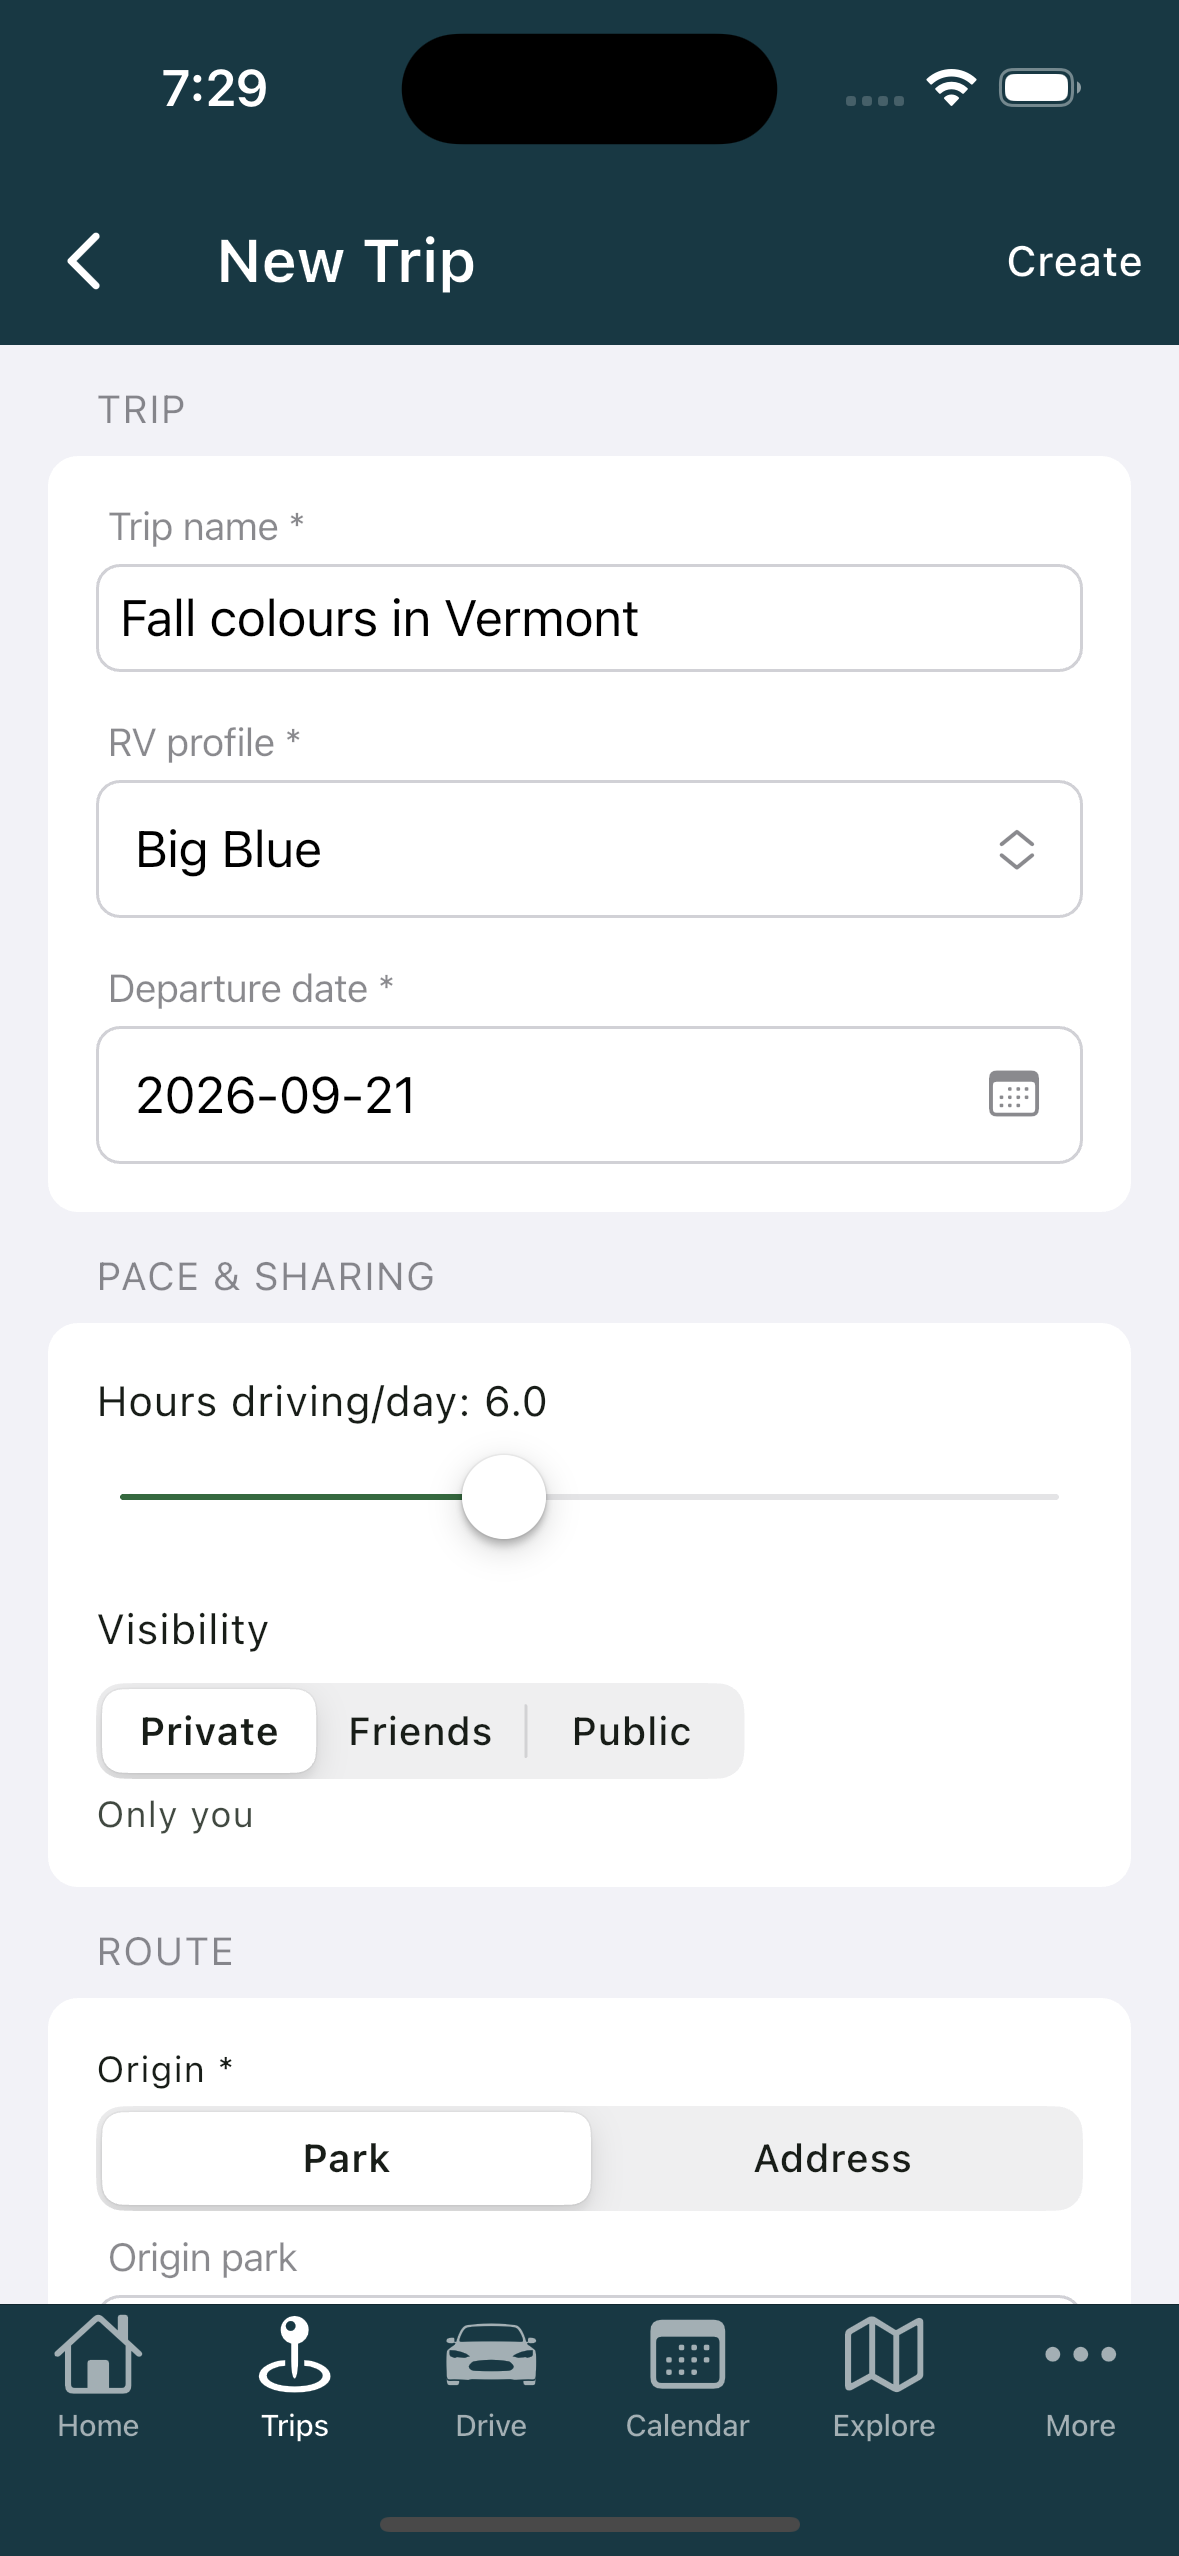
The screen is titled New Trip with three sections, Trip, Pace & sharing, and Route. Fill in Trip name, RV profile, and Departure date. Set your daily pace with the "Hours driving/day" slider. For origin and destination, use the Park and Address toggles to pick how you enter each. Then tap Create trip.
Who can see it
Visibility is Private, Friends, or Public, and it starts on Private. Private is yours alone. Friends shows the trip to people you are connected with. Public shows it to anyone with the link. You can change it later.
Related
- What the trip statuses mean
- Adding and arranging stops
- Adding your RV (and why the numbers matter)
- Connecting with friends
- Sharing a trip with friends
Was this article helpful?
That’s Great!
Thank you for your feedback
Sorry! We couldn't be helpful
Thank you for your feedback
Feedback sent
We appreciate your effort and will try to fix the article