For each stretch of your trip, the planner can offer up to three routes. They are drawn on the map in different colours, and each one shows its distance and driving time so you can weigh a faster road against a shorter one.
On the web
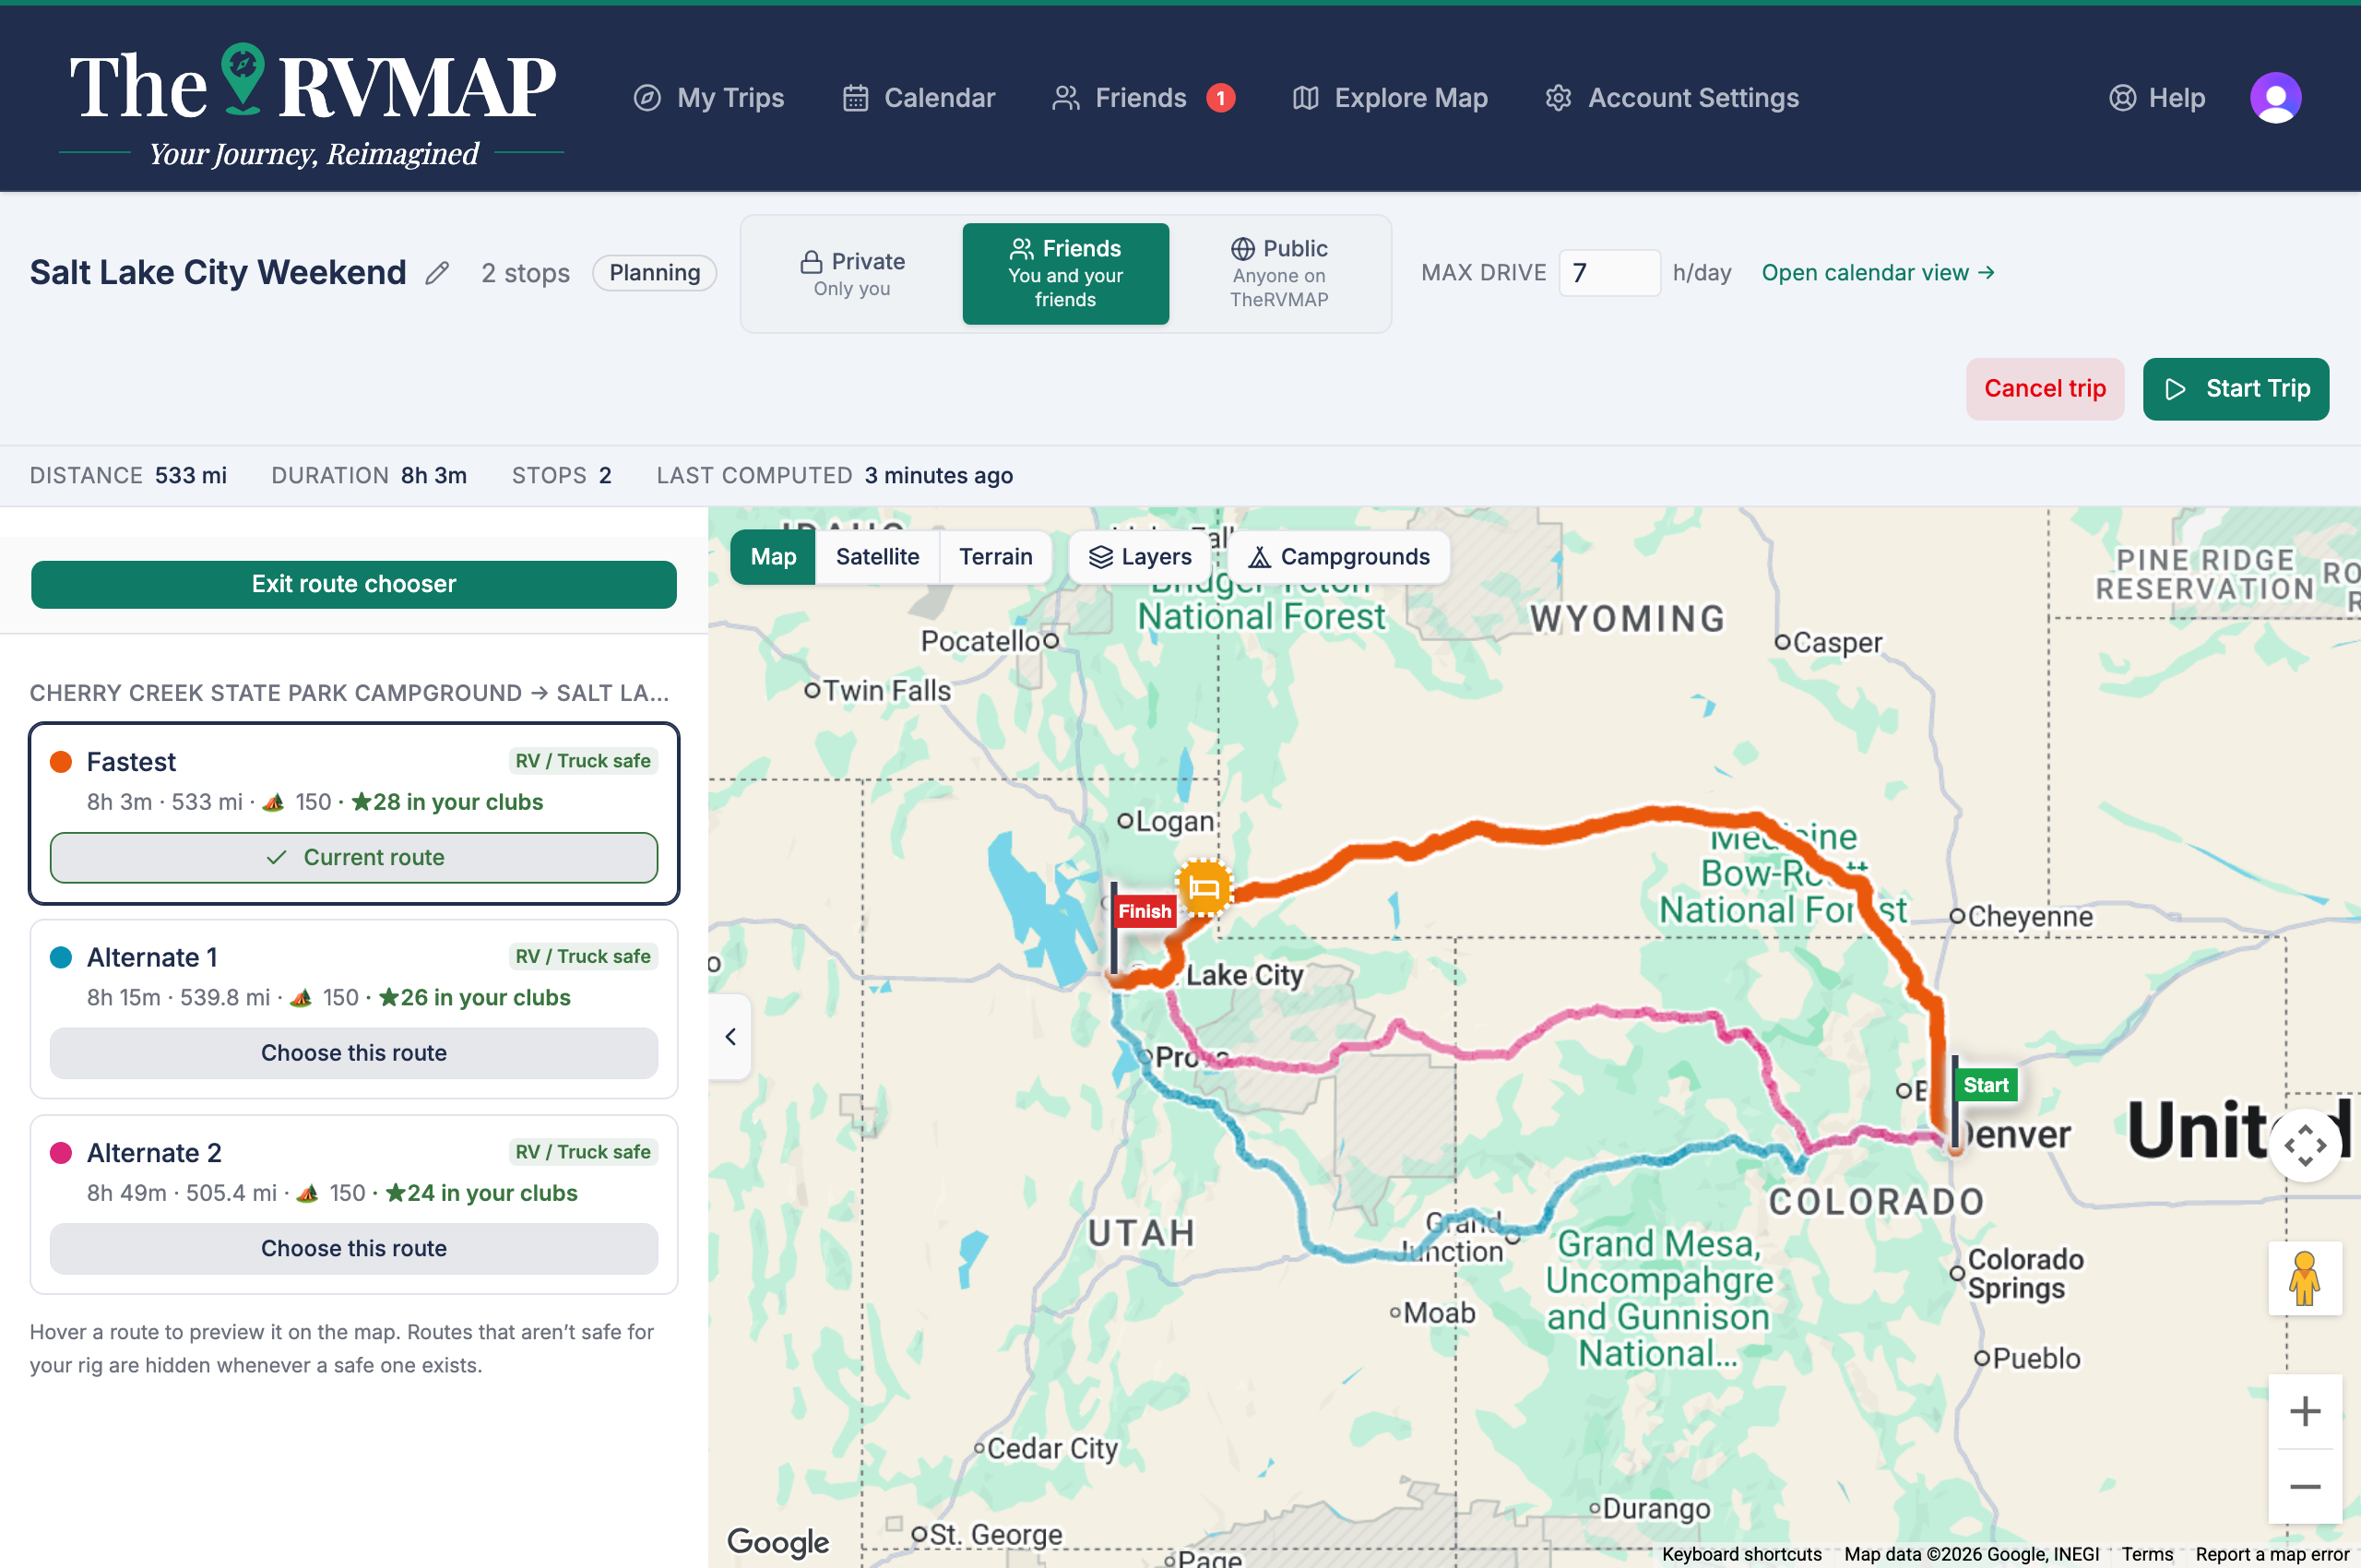
The panel walks you through one stretch at a time. A Segment X of Y selector lets you move between stretches, and any you have already settled show a check. Hover a route to focus it on the map, then commit with Choose this route.
In the app
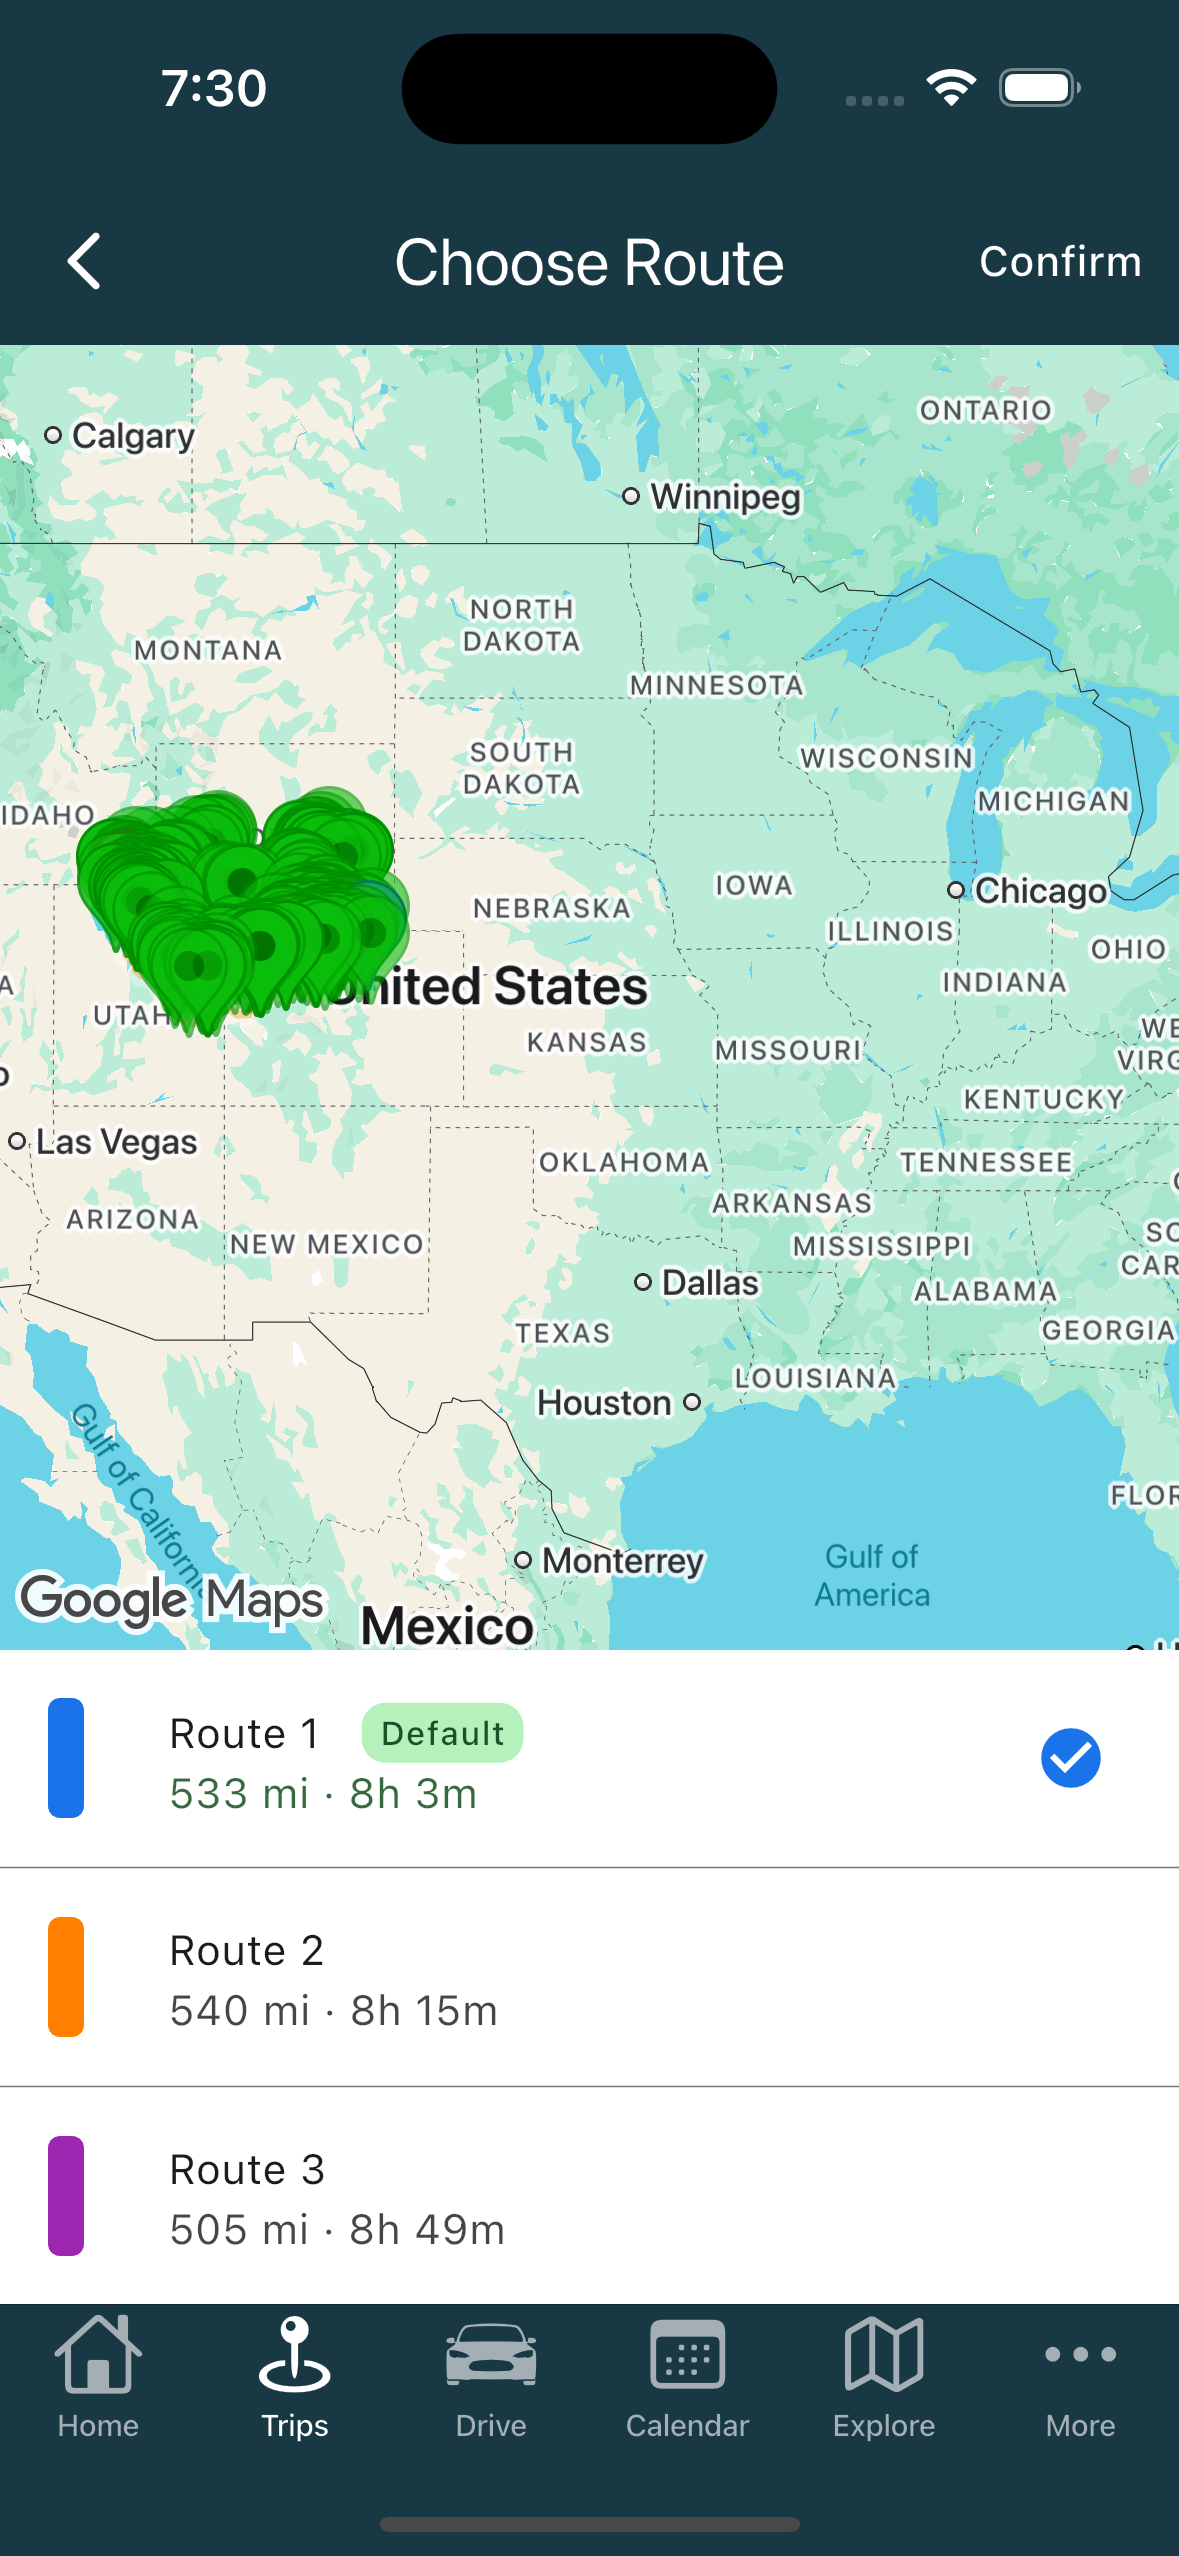
The screen is titled Choose Route. It lists the choices as Route 1, Route 2, and so on, with the distance and time beneath each. Tap the one you want, then tap Confirm.
What the badges mean
- Car only marks a route that is not suitable for your rig. On the phone you cannot tap Confirm while a Car only option is selected.
- Tolls marks a route that includes toll roads.
- Default marks the route the planner picked for you.
A note on warnings
Any warnings the mapping service returns are shown in its own words, so you see them as written rather than filtered through us. They are a heads-up, not a complete list of every hazard on the road, so read them and still trust your own eyes.
Related
- Routing is built for your RV, but you are still the driver
- Why the trip says "route needs recomputing"
- Where the planner suggests you sleep, and how to pick the park
- Finding campgrounds and places along your route
Was this article helpful?
That’s Great!
Thank you for your feedback
Sorry! We couldn't be helpful
Thank you for your feedback
Feedback sent
We appreciate your effort and will try to fix the article